Installing the Irrigation
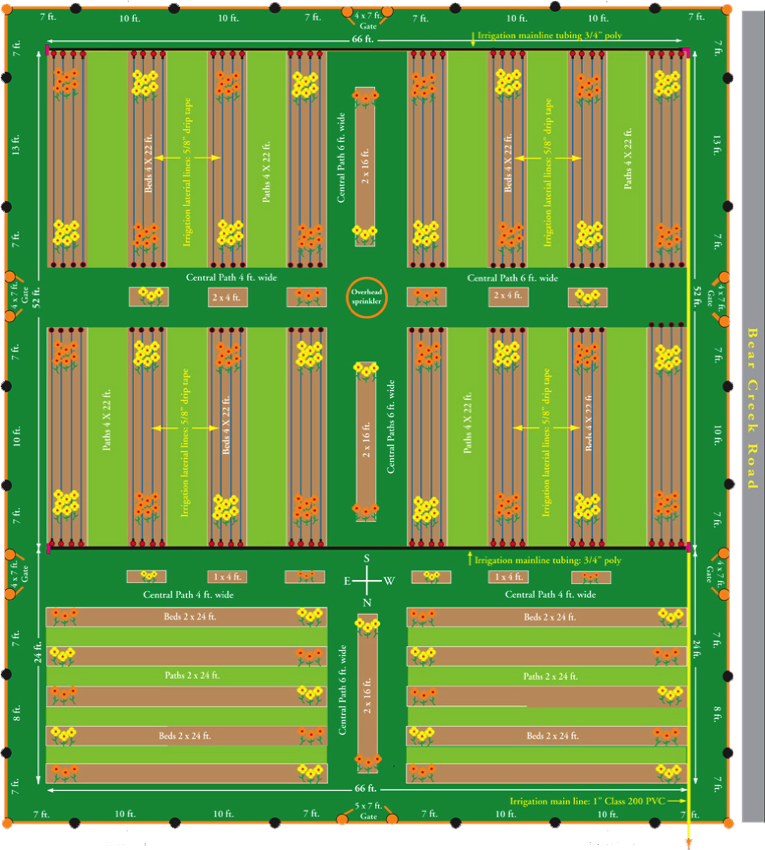
After building up the beds and fencing out the deer, it was time to turn our attention, not to mention our time, labor and money, to setting up the irrigation system. To do this, we ran a 1-inch polyethylene pipe from an underground line in the nearby garden—it's connected to our irrigation well and its 2-horsepower pump, which operates off a mechanical timer—to a valve system on the edge of the flower farm. From this valve we ran a 3/4-inch poly main line along three sides of the beds, and from this we connected 5/8-inch, low-pressure drip tubing that runs 4-lengths per bed. The emitters on the tubing—or "tape," as they call it in the industry, but they sure look like "tubes" to me—are 8-inches apart. This means each 100 square-foot bed is supposed to receive about 1/3-gallon per minute, or 20 gallons per hour, of total water from approximately 144 emitters. At least, this is the advertised rate; the actual flow is probably less, but so far it's working just fine.
The diagram below is a rough representation of the irrigation layout for the 16 main beds. The 10 secondary beds near the bottom will receive the same treatment next year. In the center of the main area, an overhead sprinkler is shown, but we no longer use this because watering from it is too erratic and wasteful, and it can damage the flowers' petals. We have, however, used the hose connections of this sprinkler for a centrally-located watering station that we use to hand-water flowers that need it.